Introduction:

Over the years, there have been multiple vulnerabilities found for many PlayStation consoles and handhelds, like the PSP, PS Vita (and the PSTV, its miniaturised console counterpart), PS2, PS3, etc. Looking at how the original Sony PlayStation has been cracked (ASM ROMhacks, CD-Drive burning and POPS), there were no write-ups detailing the process of stack-smashing the savegames themselves on official retail discs.

But today, I wanted to share how I found stack smash vulnerabilities in savegames on the original PlayStation. This guide will also teach you the basics of finding flaws in games that run on MIPS processors. Without further ado, let’s begin :D

Before we start:

You need know some things before you get started. Otherwise, you’ll be going in blind doing this stuff.

  • A crash isn’t necessarily exploitable (as noted in my past write-up). A crash might be exploitable, depending on what’s being overwritten or what’s being messed with
  • I suggest that you look up how stack-smashing works. To save time, let me Google that for you.
  • Know that PS1 games are compiled to MIPS machine language. We’ll mainly be focusing on getting control of the register $ra/r31, which is our return address. You can find more details on these registers here!
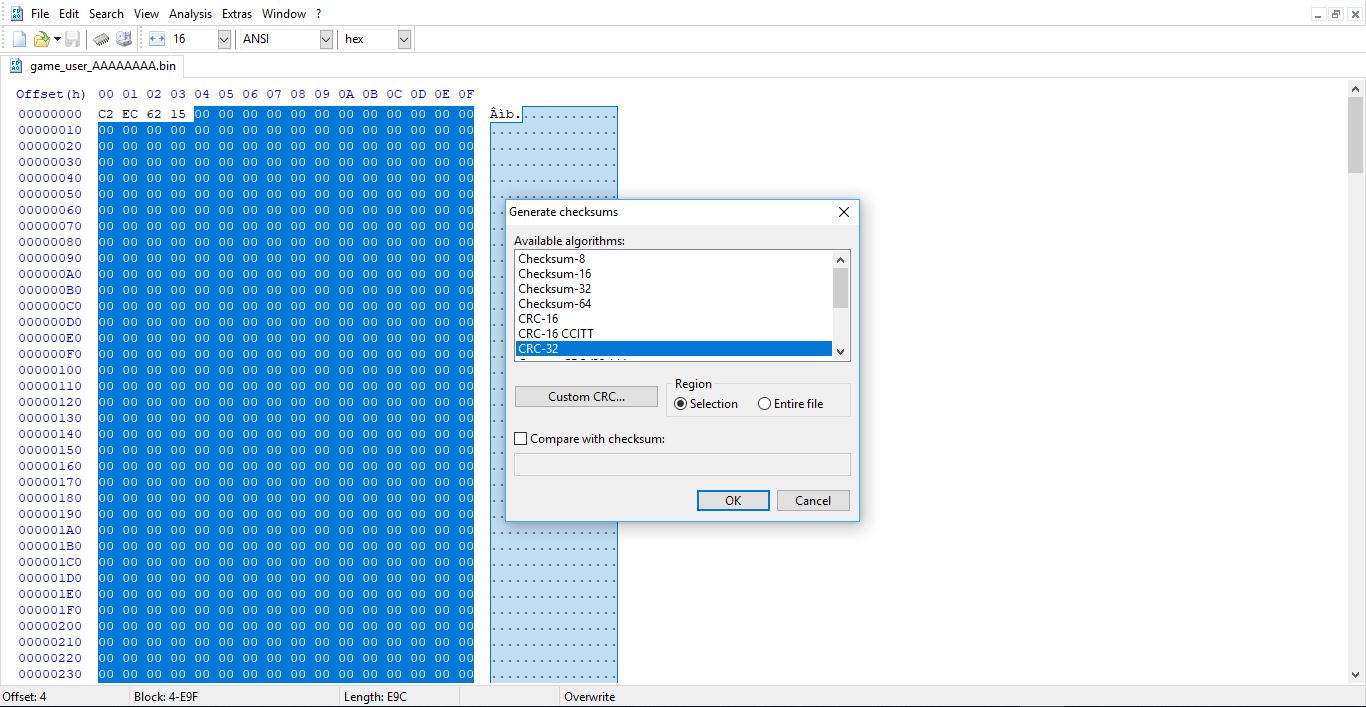
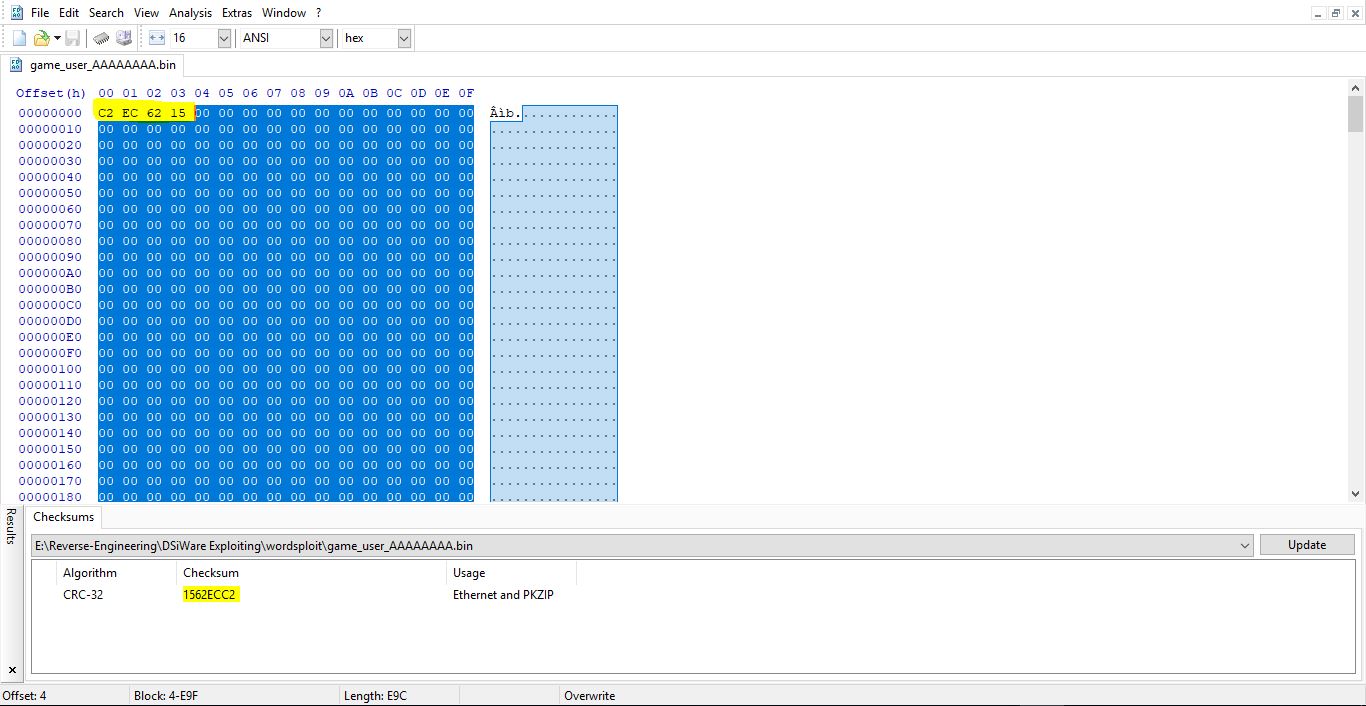
  • Most or almost all PS1 games do not use checksums, nor do they have any type of ASLR (as far as I know).
  • Some overflows in games can turn into integer overflows, which would be a bit of a pain to deal with but they’re still exploitable (integer overflows will not be covered in this write-up).

Tools I used:

Now let’s move on! You’ll need the right tools to be able to get through this write-up if you’re following along. Here are the tools I used:

  • no$psx - A really useful emulator for the original PlayStation with debugging capabilities.
  • HxD - I use this hex editor a lot, and it has helpful analysis features that we’ll use in this guide.
  • PS1 games - Of course you’re going to need a game to do some research - one that you obtained a legitimate backup of by dumping yourself, of course :P

Picking a target:

For the sake of this article, we’ll be looking for potential stack-smashing vulnerabilities. I usually start with games that have profile names or some type of username input like cars, clubs names, etc. It doesn’t have to be strictly profile names, and there are some games that allow putting in your name if you achieve a high-score. Memory card names are another possible attack vector. Even if the string is short, you can still try.

So, I’m going to be using the game “Castlevania Chronicles” (This game is really good and you should actually play it) since there’s 2 ways to actually stack-smash this game. So remember what to do:

  • Look for profiles that allow you to set a custom name.
  • Look for games that allow you to set a custom name on achieving a high score.
  • Don’t just edit a section of the save if you don’t know what it’s used for. Doing so may corrupt the save itself.

It shouldn’t be a challenge to pick a title to observe. If a game has user-inputs like names, you should be good to go.

Attempting an overflow:

Now that you have the things you need, you are now ready to go ahead and edit start messing with savegames. Castlevania Chronicles comes with the Arranged/Original versions of the game. Both have separate profile name entities which makes it a dual win if you wanted exploit both versions of the game. If one doesn’t work, there’s a chance that the other will work.

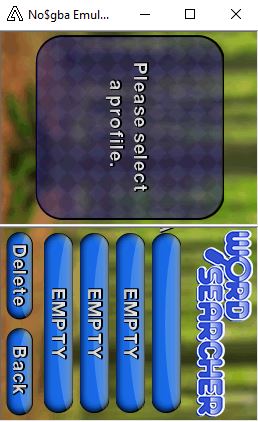
I’ll be looking over the ‘Original’ version of the game since it’s more accessible than the arranged version. As mentioned before, I am able to compose a username string for my profile in the ‘Original’ version. Let’s now look for the “AAAAAAAA” string in the memory card save.

NO$PSX stores memory card saves in the ‘MEMCARD’ directory. Most saves will have the ‘.mcd’ extension. Close NO$PSX and open the corresponding memory card save in HxD. Taking a look at the save, we were able to find our profile name.

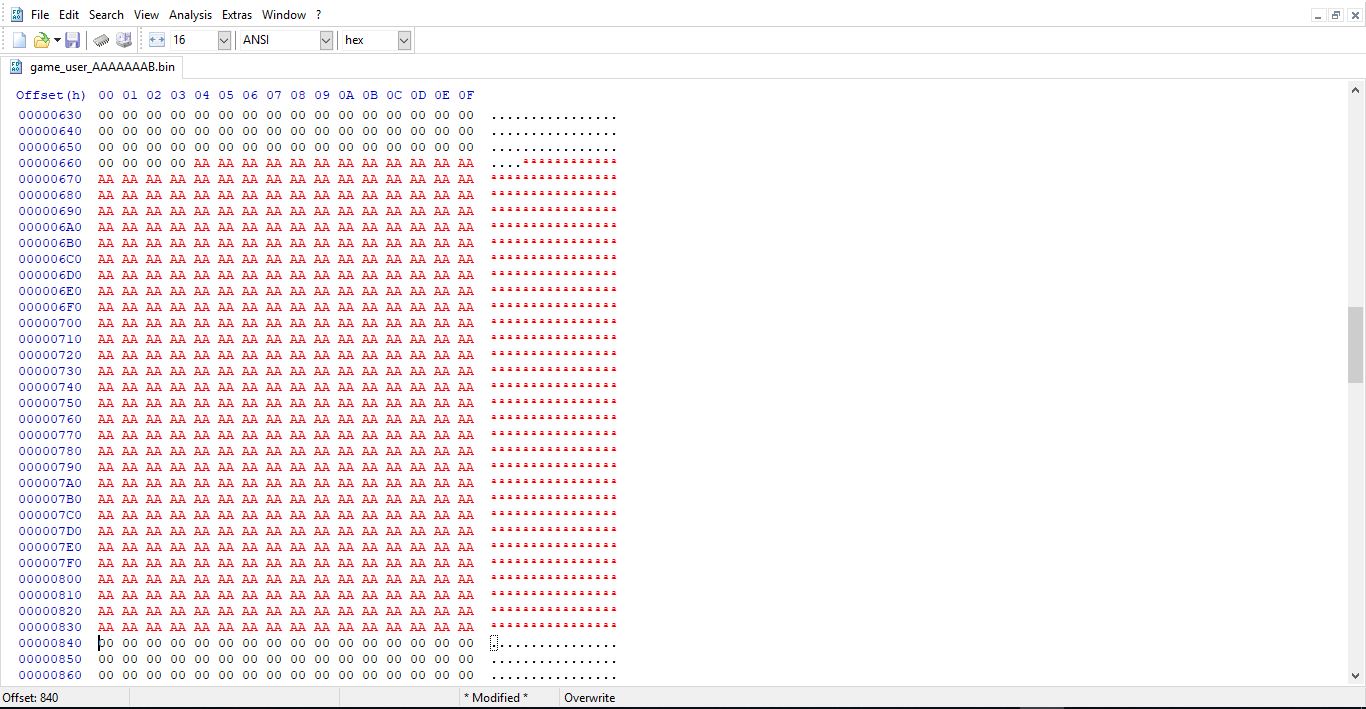
Since the PS1 doesn’t really have any checksums, you can pretty much freely edit the save. Let’s start with a large string and see what happens when we open it in NO$PSX. We’ll simply narrow things down to letters to pinpont what’s overflowing and where.

From the screenshot above, we’ll run this memory save in NO$PSX. We’ll see if it crashes and we’ll take a look at the CPU registers to see that $ra/r31 is being overwritten with our long string. If you notice that the game just crashes and that the NO$PSX exception doesn’t pop-up, you might want to pause the emulator itself and look at the CPU registers that way. If this still doesn’t work, the game will have encountered a fatal crash and you might’ve overwritten too much. It’s best to narrow things down 1 byte to another. Overflowing too much of the stack will just do random things like NOP(s).

Looking at the screenshot below, we were given an exception error in NO$PSX!

Our profile name has overflown some of the stack registers and the main target, $ra/r31, has been overwritten as well with our FF(s). This game is vulnerable :D!

Refining the Return Address:

Okay, so now we know that our game is vulnerable, let’s refine our string to find the where the return address is being overwritten. This is a simple procedure since all you’re doing is simplifiying the string. So what I did for this game is that I rewrote part of the string with 0x20 (the ‘ ‘ character for those of you that haven’t memorised the ASCII encoding scheme) and focused on the FF(s). For simplicity, I’ll rewrite those FF(s) to numeric hexidecimals. This should be enough to pinpoint where our return should be placed as shown below.

It doesn’t matter if you do either numeric or alphabetical hexidecimals, as long as you can easily pinpoint where the return address gets overwritten, you should be fine.

Let’s now run this in NO$PSX and see what we get. Also, remember that the CPU registers are 4 bytes long. As the game runs, our refined string should be read in the return address. From there, we have basically what we needed to overwrite.

And what do you see… if you look at the register?

$ra/r31, it’s being overwritten with 0x55554444. But you should also note that it’s displayed as little-endian. Our original input was 0x44445555, so it’s been reversed. Always keep that in mind. But moving on, we now know where our return address is being overwritten.

Defining our Return Address:

Let’s go back into HxD to trail our return address.

So once again, we replaced the unnecessary bytes with 0x20 to keep things clean and rewrote the 4 bytes with 0x58 (translates to ‘X’). We can apply this to a real MIPS exploit to jump to our payload and start running unsigned code.

This won’t be covered in this writeup since similar jump addresses can be explained. Plus, real code execution hasn’t been achieved yet while I was doing this. But let’s save the memory save and head right back into NO$PSX.

Once you trigger the overflow again, you should be greated with something similar you placed at the jump address. We have full control over the return address and can jump to anywhere in the savegame. We used our own bytes to overwrite the return-address.

As mentioned before, this can be used to jump to our payload if we wanted to get demo code working. But now, we can call this simple exploit “CastleSploit” :D.

Closing:

Hopefully this article/writeup gave you an overview on stack smashing games running on MIPS processors. Eventually, I would like to see this being used in action to actually execute some demo code. Hopefully I can get this to work on my own as well and update this guide if needed. Also, this can be applied to the PSP since its games are also coded for MIPS processors. You can find neat writeups on those somewhere.

If you have any questions regarded to anything related to this article, you can contact me on Twitter: @ChampionLeake79

Credits:

I would like to thank all of the following:

  • Jhynjhiruu - Your friendly neighbourhood Grammarly™. Big thanks for improving the grammar (note: there’s only so much that can be done; you should have seen this before I started!).
  • @AcidSnakeDev, @freakler94, @qwikrazor87 - Inspiriation on Sony PSP (PS1-mini hacking)
  • St4rkDev - Helpful friend in using integer overflows as a way to take over some registers
  • Everyone else who contributed to giving me helpful advice If you’re not on this list and I forgot to add you, let me know.

Introduction:

I noticed that there were some questions about how some reverse-engineers or hackers find exploitable vulns in DSiWare applications. I also noticed that there weren’t any write-ups, nor any documentation, on discovering DSiWare application flaws.

But today, I wanted to explain how you could find vulnerabilities in DSiWare applications, as well as saving people time from not having to ask whether a game is vulnerable or not. Plus, I think this could be a good introduction to learn how to get into exploiting applications or games. Without further ado, let’s get started :D

Things to know:

To get things out of the way, you need to know some things before you get started.

  • A crash isn’t necessarily exploitable. Of course, a crash might be exploitable, but if it doesn’t overwrite parts of the stack registers, it’s not likely to be exploitable - but that will be covered later.
  • I’ll only be covering stack smashing flaws since they’re the easiest to start with and I’m familiar enough with these types of vulnerablities to explain what they are. I suggest that you look up how stack smashing works. There’s an overview on this topic over at CTurt’s DS-exploit-finding guide.
  • You must know that the DSi uses a ARM Processor. R0-R12 are generally based use for calculation and the last 3 (R13 (SP = Stack Pointer), R14 (LR = Link Register), and R15 (PC = Program Counter)) are unique. You can find more details on these registers here!

Tools I used:

Now let’s move on! You’ll need the right tools to be able to get through this article. Here are the tools I used in this article:

  • NO$GBA - A really useful debugging emulator which can emulate your DSi NAND.
  • TWLTool - Used to decrypt/encrypt your NAND dump. That way, you can edit the NAND with the save you’re injecting for NO$GBA.
  • HiyaCFW (Optional) - This makes it easy to access your savedata as SDNAND isn’t encrypted. This is optional, though.
  • FWTOOL - This is used to dump your NAND so you can use it in NO$GBA to debug/emulate your DSi. You’ll need homebrew access to run it.
  • HxD - I use this hex editor a lot, and it has helpful analysis features that we’ll use in this guide.
  • VBinDiff - Used mostly to compare files against each other. This will help find the differences in a DSiWare savefile for checksums, different names or other garbage tbh :/
  • OSFMount - This tool will be useful for mounting the public.sav file to access the ‘real’ savedata. Although the save is in the public.sav, it’s useful to just mount the file and take what’s in it to observe and then put it back.
  • Money - You’ll need it to buy these games you don’t have. This is obviously not required if you’re tesing games you already own.

Picking a target:

For the sake of this article, I’ll be looking for stack smashing vulnerabilities in DSiWare applications. I would start with games that have profile names or some type of username input. It doesn’t have to be strictly profile names, and there are some games that allow putting in your name if you achieve a high-score - like Fieldrunners. Even if the string is only 3 bytes long, you can still try.

So, I’m going to use a simple game called “WordSearcher” that I already looked at. It’s not vulnerable, but it’s useful for a really good example. So remember what to do:

  • Look at the list of examined DSiWare titles before you start. Don’t waste your time if you’re looking at finding new flaws.
  • Look for profiles that allow you to set a custom name.
  • Look for games that allow you to set a custom name on achieving a high score.
  • Avoid games with multiple elements (some RPGs) unless you like the challenge for solvling checksums. Some may not have too many checksums but it’s recommended to start simple.

It shouldn’t be a challenge to pick a title to observe. I’ll also be looking at Fieldrunners to show you what it looks like to find a useful flaw.

Getting past Checksums:

Checksums play a huge role for certain games or applications. For those of you who do not know what checksums are, allow me to break it down for you.

The word “Check” should ring a bell. The word “Sum” is like the total of some numbers or bytes. Maybe adding if you’re a mathematician ALWAYS adding. So if you really put those 2 meanings together, you can tell they’re checking something. But for what purpose? It’s to ensure a file or a section in a file is not corrupted or tampered with. Without checksums, programs/applications would be extremly vulnerable to simple attacks.

Editing a savefile with checksums without actually patching those checksum bytes will normally make the game delete or rewrite the save. So that’s what we need to take care of before we start editing whatever we please. Let’s create some saves and compare them so we can locate the checksum(s) for “WordSearcher”. It’s common for some DSiWare titles to use a familiar CRC algorithm which gives you a greater chance to patch checksums easily with HxD or other checksum calculators.

So, I’m going to create 2 savefiles (two “public.sav”s). One will contain the username “AAAAAAAA”, and the other will contain “AAAAAAAB”. We’ll eventually use VBinDiff to compare the two files and look for differences. We first have to fetch the real save that’s mounted within the “public.sav” file. This can be done with OSFMount or any program that can mount disk images.

You must have a DSi NAND dump (that you dumped yourself). Wintermute’s FWTOOL 2.0.0, homebrew application, should help you dump your NAND. The last things you’ll need are your DSi’s CID and ConsoleID, which you can obtain by looking at Gadorach’s downgrading guide.

I assume that you already have the things you need. I’ll quickly go over what you need to do when mounting your NAND to fetch the public.sav(s).

Your NAND needs to be decrypted before any mounting should occur.

  • Open up “OSFMount”.
  • Select “Mount New…”.
  • Click the “…” button to the right of “Image file”.
  • Find your DSi’s NAND and select “Partition 0”.
  • Click “OK” Your setup should look like the screenshot below.

Now you should be able to open your mounted NAND and look for the correct titleid for your corresponding DSiWare title in “/title/0030004/TITLEID/data/”. Copy the “public.sav” file to somewhere safe.

You can basically repeat the whole process. Create a new save with a different name, dump your NAND again, decrypt your NAND, mount your NAND, and find the “public.sav” again. I still suggest renaming those files to stay organized. After you’re done you can still rename it back to its original name. Let’s now move on to mounting our savefiles.

  • Open up “OSFMount”.
  • Select “Mount New…”.
  • Click the “…” button to the right of “Image file”.
  • Find the “public.sav” (or the renamed savefile), I renamed the “public.sav”s to “AAAAAAAA.sav” and “AAAAAAAB.sav” for the purpose of this article.
  • Uncheck the “Read-Only drive” box and check the “Mount as removeable media” option.
  • Click “OK” and you should be ready to go. Copy the file that’s mounted from the savefile and place it somewhere safe. Repeat the whole process with the other savefile as well.

We can now move onto using VBinDiff to compare the two savefiles.

Select the two savefiles and drag them to the VBinDiff program and it should give you this.

We seem to have found the differences in these saves. By pressing Enter or manually scrolling, it’ll find another difference in the saves. At offset 0x0, for both files, it seems we might be dealing with CRC32, considering that the first 4 bytes are different within the saves. CRC8/Checksum-8 would be 1 byte long, CRC16/Checksum-16 would be 2 bytes long, and of course CRC32/Checkum-32 would be 4 bytes long. Since we now know where the checksum is located, we’re going to start investigating what and why those bytes are what they are. Let’s open our saves in HxD.

I mentioned eariler that HxD has really useful features such as checksum analysis. This is where we’re going to attempt to use those features to figure out if the checksum is using a classical-polynomial algorithm or using a custom-polynomial algorithm. I’ll only be cover classical-polynomial, since custom checksum algorithms require dumping the game’s code and using a disassembler (like IDA Pro) to reverse-engineer the code to find the CRC function. I don’t know how to do something like that yet, but we’ll be doing something else that I’d like to call WemI0Sum (since he taught me this way of dealing with checksums).

What is the ‘WemI0Sum’ method? It’s a process that can help easily patch checksums (if the game uses a classical-polynomial algorithm). This method can also be used to determine if a game uses a classical-polynomial algorithm or not. The process consists of highlighting/selecting blocks/chunks in the save and using HxD’s CRC analyzer. The ‘Weml0Sum’ method can be time-consuming because you’re guessing which blocks to select to match the initial checksum in the save file. The ‘WemI0Sum’ method is good if you don’t want to deal with dumping the game’s code, so let’s try this method with these savefiles we have.

Open one of the savefiles in HxD if you haven’t. I selected basically after the first 4-bytes. It’s all about guessing which blocks match the current checksum. I went from 0x4 to the very end of the file. Finding the right blocks could take hours or days to find the perfect area where the checksum will be correct. But take a look at the screenshot of how things should look if you followed along:

The ‘WemI0Sum’ method help us will determine if the game uses a classical-polynomial algorithm or not.

  • Once you have the selected area, navigate to “Analysis”.
  • Select the “Checksums…” option.
  • Be sure to choose the appropriate algorithm. In this case, the game uses CRC32/Checksum-32 so I select CRC32 first and pressed ‘OK’.

Now what do you notice about the yellow highlighted areas in the screenshot above? Yes? No? Either way, THE RESULTS ARE THE SAME, BUT BACKWARDS. That’s good! Most calculators will present the checksum in little-endian format.

Note how the bytes “C2 EC 62 15” in the save are backwards from the checksum “15 62 EC C2”. To make sure this is correct we’re going to take a look at the other file to make sure.

Once again, the bytes seem to be identical but in little-endian format. We can confirm that the game does use a common CRC32 polynomial algorithm. From there, you can basically use an open-source CRC patcher - just edit/add the offsets, and there you go, you have yourself a CRC patcher for your game. Now that we cracked the checksum of this game, we can move on to the next section. Keep in mind that not all games will be easy with this method due to reasons I explained earlier. You’ll need to disassemble the game’s code and look for the CRC function itself. That is slightly beyond the scope of this article.

Attempting an overflow:

If you’ve made it this far, congratulations, you’re finally ready to go ahead and edit the game’s savefile to look for potential vulnerabilities. WordSearcher’s profile name has a character limit that means names can only be 8 bytes long. Let’s see what happens if we use an very long string for our profile. I like using “AA”s since I find that easier to look for in the stack and see if any were overwritten.

Once you’re done adding/editing the profile name with a long string, you can go through the ‘WemI0Sum’ process to correct the checksums or, if you already made a tool to patch it for you, use that.

Rename the savefile back to its’ original name (in that case, the game’s original save name was ‘game_user.bin’). You should copy and paste the overflowed savefile back into the ‘public.sav’ while OSFMount is open. Once things are done, you’re free to “Dismount all & Exit” the program. (Click OK if there’s a warning).

You’ll need to decrypt your NAND and inject the ‘public.sav’ to its’ original directory. After that, you can dismount the NAND and re-encrypt it with TWLTool so you can run it in NO$GBA. You can find the tutorial for that here under the “Decrypting your NAND” spoiler.

Once our NAND is re-encrypted, we can now try to emulate our NAND in NO$GBA. I won’t go over how to set up the NAND for use in NO$GBA since it’s a bit time-consumming. You can find instructions on the offical NO$GBA website.

Open up NO$GBA and start the system menu by choosing any DS(i) ROM in the files menu. We now can test our overflowed save for ‘WordSearcher’.

ON REAL HARDWARE, this part of the game would freeze and crash. Let’s see if this happens in NO$GBA.

If you remember from the beginning of this article, I mentioned that this game is not vulnerable. I’m going through this process to show you what would a useful and useless crash would look like in NO$GBA. In the emulator, it doesn’t seem to have any error popups, overwritten registers in the highlighted regions, etc. But it’s still not over. There are always more creative ways to look for flaws in a application.

We know that the profile names are not vulnerable. The game uses plaintext crossword levels. This could be a potential flaw in the game if it’s bounded. So let’s try it! We’ll first need to generate the crossword data in the save, which can be done by just starting a crossword level and then saving and quitting. We now have to repeat the process of dumping our NAND, decrypting it, fetching the save, mounting it, and then editing our save.

Instead of “AA”s, I changed things up and used “BB”s. We used a very large string once again to replace/overwrite one of the crossword levels. We can now finish things up with the ‘Weml0Sum’ method or use a working CRC patcher to correct the checksums. Now we just need to repeat injecting the save into the NAND.

We now test our overflowed save once again in NO$GBA and there seems to be no errors nor any registers being overwritten. But at least there can be custom/non-existent strings in the crossword board itself! We can now conclude that this game doesn’t seem to be vulnerable to stack smashing. :(

Now let me show you what a useful crash would look like in NO$GBA with the game “Fieldrunners”. You can tell if the game crashed in NO$GBA if an error popup shows and, in the highlighted area, some of the registers are overwritten with “AA”s. If R15 (the PC) is overwritten as well, you have yourself an exploitable application!

Closing:

So I hope this article/writeup gave you an overview on how to find vulnerabilities in DSiWare titles. Hopefully I can update this article to cover things like reverse-engineering the checksums by using IDA Pro and maybe more. If you ever have any questions, you can let me know on my [Discord server and I’ll try my best to answer all of your questions.

Hopefully I can get a writeup about porting NDS-HBMenu to exploitable games. Anyways, I’m suprised you made it this far considering how long this article is. I hope you learned something today at least.

Credits:

I would like to thank all of the following:

  • Jhynjhiruu - Your friend neighborhood grammarly. Big thanks for improving the grammar.
  • yellows8 - for originally exploiting Fieldrunners.
  • nocash - for creating no$gba and the excellent documentation.
  • WinterMute - for creating FWTOOL and TWLTool.
  • WemI0 - for teaching me the ‘WemI0Sum’ method.
  • CTurt - for the inspiration of his DS-exploit-finding guide.
  • Jerbear64 & emiyl - for the DSiCFW guide If you’re not on this list and I forgot to add you, let me know.